The Library
Last updated September 18, 2026
The Library is where reusable content lives — resort write-ups, ship overviews, destination notes, standalone guides, and full day plans. You build a piece once, then drop it into any itinerary or proposal instead of retyping it.
Everything in your Library is private to your account unless you deliberately share it. It only reaches a client when you add it to an itinerary or proposal yourself.
The Tabs
Go to Library in the sidebar. The tabs across the top:
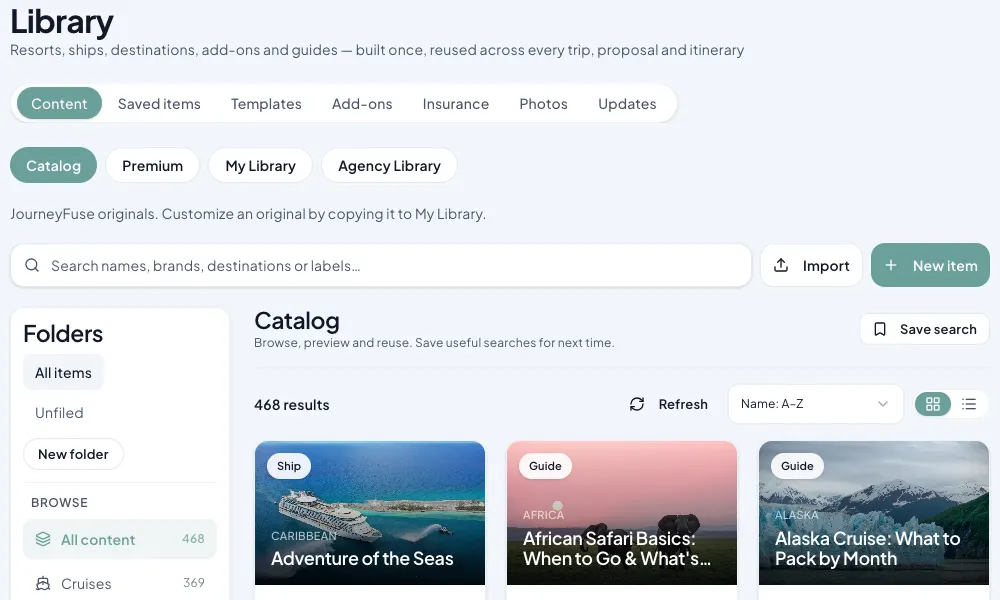
| Tab | What's there |
|---|---|
| Content | The main library — every item you can read or use. This is where most work happens. |
| Templates | Your reusable templates, in three shelves: Proposals, Task lists (Task Templates) and Supplier milestones. These used to live in Settings. |
| Suppliers | Resorts, hotels and ships from the catalog. Save one and it becomes your version — see Saving Resorts to Your Library. |
| Saved Blocks | Individual itinerary blocks you saved to reuse. |
| Insurance | Insurance plans you can attach to proposals. |
| Photos | Your uploaded image library. Search it by name or tag here or from the Library tab of any photo picker in a proposal or itinerary. A photo you paste or drop onto a hotel, option or itinerary block is named after that hotel, option or block, so it is findable later; a photo with a real filename keeps it. Rename or tag anything from this tab. |
| Premium | Paid content from outside publishers, plus key redemption — see Premium Publisher Content. |
| Updates | Changes published to content you're already using. |
The Headings Are Types, Not Folders
The headings on the Content tab — Resorts & properties, Ships, Destinations, cities & parks, Guides, Day plans & itineraries — are not folders you file things into. Each item carries a single Type, and the list groups by it. To file items your own way, use Folders (below).
Eight types, and the heading each one falls under:
| Type | What it's for | Groups under |
|---|---|---|
| Property | A hotel or resort | Resorts & properties |
| Ship | A cruise ship | Ships |
| Destination | A region or country | Destinations, cities & parks |
| City | A single city | Destinations, cities & parks |
| Park | A theme park or resort area | Destinations, cities & parks |
| Guide | Standalone advice, not tied to a place | Guides |
| Day plan | A reusable single day | Day plans & itineraries |
| Itinerary | A full reusable trip | Day plans & itineraries |
A heading only appears when something in view actually uses it. If nothing in your current filter is a Ship, there is no Ships heading. Narrow the list and headings disappear, which is normal.
Picking or Changing a Type
You choose the Type when you create the item, and you can change it any time afterward.
- When creating: click New item, enter a name, pick a Type, then Create & add sections. The dropdown starts on Property, so change it if that's not what you're building.
- Afterward: open the item, click Details at the top, and pick a different Type. Press Save when you're done — this screen does not save as you type.
The Details dialog is also where you set a Destination, link the item to a specific property or ship, and control sharing.
Folders
Folders work the same way they do on the Photos tab. They sit at the top of the left panel on My Library and Agency Library (on a phone, use the Folder dropdown above the results).
- Make a folder: click New folder and give it a name. To nest one, pick a folder first, then click New subfolder.
- File items: choose All items, click Select items, check the items you want, then click Move to folder and pick the folder. An item lives in one folder at a time; moving it again takes it out of the old one.
- Browse: picking a folder shows everything in it, including its subfolders. Unfiled shows your own items that are not in a folder yet.
- Rename or delete: pick the folder, then Rename or Delete. Deleting removes the folder and its subfolders only. The items inside are kept and show under Unfiled.
Folders are shared with everyone in your agency. They never change an item, its labels, or anything a client sees. Catalog and Premium items cannot be filed; copy one into My Library first.
Where Content Comes From
Your Content tab shows more than your own work. Click Add filter and pick a Source:
| Source | What it is |
|---|---|
| All | Everything you can see. The default. |
| JourneyFuse | The built-in platform catalog. |
| Premium | Content from publishers you've unlocked. |
| Agency | Shared by others in your agency. |
| Mine | Only items you created. |
Mine is the fastest way to find your own material once the catalog starts crowding the list.
Readable is not always editable. Most of what you see is catalog and publisher content you can use but not change. To make your own version, open it and click Copy to my library — you get a full copy you own outright.
The same Add filter menu carries Type underneath Source, so you can narrow to Guides, or to your own Guides, in two clicks. The list shows photo cards for small result sets and switches to compact rows once there's a lot to scroll.
Importing Your Existing Guides
Moving from other software? You don't have to retype your destination and resort write-ups. On the Content tab, click Import (next to New item) and either upload a PDF or paste the text.
JourneyFuse reads it and proposes library items for you: each resort becomes its own Property, an island or country write-up becomes a Destination, and so on, each split into sections at the document's own headings. Nothing is saved until you've reviewed it:
- Tick or untick any item or section. Anything that looks like it belongs to one past trip, such as a quoted price or a check-in line, starts unticked.
- Click a section to read the original text it came from, with its page number.
- → tucks a section under the one above as a sub-section; ← moves it back out.
- Rename an item or change its type right on the card.
- Already have it? If you own an item with the same name, the import offers to add the new sections to it instead of making a duplicate.
Your words are kept exactly as written. The import only decides where each section starts and what to call it, and the review screen lists anything it left out, such as a contents page or the name and phone number printed on every page.
Imported items are private (Only you) until you share them, and you land on My Library afterward so you can open each one and add photos.
Bringing in a supplier's web page? Open the page, select everything on it (Cmd+A on a Mac, Ctrl+A on Windows), copy, and paste it into Paste text. The menus and footer the copy picks up are left out or easy to untick on the review screen. There's no box for a link: many supplier sites turn away anything that isn't a person's own browser, so copying from the page you have open is the reliable way.
Charts come in as one line per row. A chart on the page you paste (a cancellation schedule, a fare grid) becomes a bulleted list, one bullet per row with each figure named by its column, for example "Between 90 and 46 Days: Standard Cancellation Terms 50% money-back refund*; Basic Protection 80% money-back refund*". The Library doesn't hold grids, and a list reads well in proposals, PDFs and on a phone.
A scanned PDF can't be read. If the pages are pictures, there's no text to import. Use the original export from your old software, or copy the text and use Paste text.
What's Inside an Item
An item is a stack of sections, and sections are what actually get inserted into a trip. Nine kinds:
| Section | Typical content |
|---|---|
| Overview | The full description — what this place is |
| At a glance | The short version, for a first quote |
| Rooms & suites | One child section per room category |
| Restaurants & bars | One child per venue, or one list |
| Activities | What guests can do on property |
| Entertainment | Shows, nightlife, programming |
| Getting there & around | Transfers, airport notes, on-site transport |
| Know before you go | Documents, dress codes, resort fees, tipping |
| Custom section | Anything else |
Sections matter more than the Type you picked. The Type controls how the item is found; the sections are what a client eventually reads.
Rearranging sections
In the Sections list on the left of the item editor, hover over a section (or click it) to show its arrows:
- ↑ ↓ move it up or down. A sub-section moves within its own group.
- → tucks it under the section above as a sub-section; ← moves a sub-section back out to stand on its own.
Only sections that hold a list, such as Rooms & suites, Restaurants & bars, Activities, Entertainment and Custom section, can have sub-sections. Hover over a greyed-out → to see why it can't be used there. Click Save to keep the new order.
Using Your Own Photos
- Cover photo: click Add Image (or Change) at the top of the item. Search Unsplash, choose Upload to pick a photo from your computer or phone, or open My media to reuse one you've uploaded before.
- Section photos: each section's Photos area has the same Unsplash, Upload and My media tabs. You can drop in several photos at once, paste one, or paste an image link.
- From a phone: Upload opens your phone's usual picker, so you can choose from your photo library.
- A big batch: go to Library → Photos and use Upload photos. They are then ready under My media in every item.
Photos can be JPG, PNG or WebP, up to 10MB each. Large photos are resized for you.
Using an Item in a Trip
Nothing in your Library reaches a client on its own. You pull it in:
- In an itinerary: open the trip's itinerary and click Library. Read an item, then add the whole thing or just the parts you want.
- In a proposal: open the proposal option editor and add from the Library there.
Both give you the same picker, so a resort write-up you built once serves every trip that goes there.
That picker lists both kinds of library content in one place: the items on the Content tab, and any resorts you saved on the Suppliers tab. A saved resort is an ordinary library item now, so it sorts and filters like everything else — you never have to remember which tab something came from.
In an itinerary it opens on your trip's own destination and ranks what it shows by how well each item fits that trip. See Adding Library Content to a Trip for the filter row, reading before adding, and premium products you have not bought.
Sharing With Your Agency
Every item starts as Only you. To share it, open the item, click Details, and tick Share with everyone in this agency. Leaving it off means only you can see and edit it.
Solo advisors can ignore this entirely — with one seat, everything is already only you.
Sharing a Saved Block
Saved blocks have their own choice, called Who can use it:
- Saving from an itinerary: click the book icon on the block, pick My agency under Who can use it, then click Save to Agency Library.
- In the Library: go to Saved Blocks, click New block (or open a block and click Edit block), pick Everyone in my agency, then click Save block. Pick Just me to move it back to My Library.
Only the person who saved a block can change who can use it.
Finding a Saved Block by Destination
Give a block a Destination (for example "Grenada" or "Punta Cana"): open it, click Edit block, fill in Destination and click Save block. You can also set it when you click New block.
The destination shows on the block's card, a destination filter appears next to the type filter once any block has one, and search matches it. A block with no destination shows its location, address or port on the card instead, so you can still tell where it is.
Internal Resources
There is no separate "internal" section, and you don't need one. A playbook, a supplier cheat sheet, or a process note is a Guide, sitting in your Library like anything else and reaching nobody until you add it to a trip.
Two habits that keep them easy to find as the Library grows:
- Start the name with a word like "Internal." Library search looks at the item name, so internal pieces pull up together and are easy to skip past when you're building for a client.
- Use the Mine filter. Add filter → Mine drops the catalog out of the list entirely.
Related
- Saving Resorts to Your Library — keeping your own version of a resort and reusing it on quotes
- Resource Guides — the separate per-trip guides that attach directly to an itinerary
- Premium Publisher Content — where a publisher key comes from and what it unlocks
- Itinerary Builder — where library sections get inserted
This is part of JourneyFuse’s itinerary builder for travel agents: reusable templates, a saved library and day-by-day itineraries.
Related Articles
Saving Resorts to Your Library
Save a resort once — your own description, photos, and private notes — and reuse it on every quote and itinerary from the Library picker.
Task Templates
Build reusable task checklists once, then apply them to any trip with due dates anchored to trip start, trip end, final payment, or the day you apply them.
Resource Guides
Create destination, packing, and tips guides, attach them to trips, and share them with your agency or the community.